
Remote Desktop for BlackBerry® Help
This is a quick guide to helping you get up and running with Remote Desktop for BlackBerry®.
Remote Desktop for BlackBerry enables you to connect to your Windows based computers across the Internet from your BlackBerry PlayBook and stay connected with your home or Office. Use your full Windows applications such as Word, Excel, Outlook, PowerPoint, and Internet Explorer along with the plethora of other applications for the Windows platform without sacrificing functionality from anywhere. You can leave your computer without losing access to your files, applications, and e-mail and there is no need to sync data as everything will be there when you return.
Do all of this without needing to install third party software or server applications as all of the server components are already a part of most versions of Windows apart from the home versions. As well you will be able to gain access to corporate systems via the Microsoft Remote Desktop Protocol (RDP) that are running Remote Desktop services where there is no option to install third party services for remote access.
Features
* 8, 16, 24 and 32 bit color support
* Standard screen resolutions including the BlackBerry BB10 native resolutions
* Maintain a list of servers with a single tap to connect
* Save your username, password, and domain to speed connections and reduce typing
* Pinch-to-zoom
* RDP data compression and caching to save bandwidth
* Support for console sessions
* Support for non standard ports
* Scroll lock to all for mouse integration for scrolling windows
* Double tap to open files
* Press and tap for right click functionality
* A menu icon to show the keyboard to ease text input
* Maintain multiple connections t the same time and jump between them
Remote Computer Software Compatibility
The following Windows Operating Systems have Remote Desktop Services and can be connected using the Remote Desktop for BlackBerry PlayBook client without any additional server side software:
* Windows Server 2000 * Windows XP Professional * Windows XP Media Center Edition * Windows Server 2003 * Windows Vista Business, Ultimate and Enterprise * Windows Server 2008 * Windows 7 Professional, Ultimate and Enterprise * Windows Server 2008R2 The following Windows Operating Systems do NOT have Remote Desktop Services and are not compatible: * Windows XP Home * Windows Vista Home * Windows Vista Home Premium * Windows 7 Starter * Windows 7 Home Premium * Mac OS * Linux
Using the Application
Tabs
![]() The Home Tab. Here you create, open, and manage all of your Remote Desktop connections.
The Home Tab. Here you create, open, and manage all of your Remote Desktop connections.
![]() The
Help tab. This will explain how to use the application and contains a brief
tutorial (see below) on setting up your environment.
The
Help tab. This will explain how to use the application and contains a brief
tutorial (see below) on setting up your environment.
![]() The
Active Connections Tab. Here you manage your open Remote Desktop Connections.
The
Active Connections Tab. Here you manage your open Remote Desktop Connections.
Working with Connections
![]() Single
tap this icon to open a Remote Desktop connection.
Single
tap this icon to open a Remote Desktop connection.
If you tap and hold the Connection icon a context menu will show with the following options:
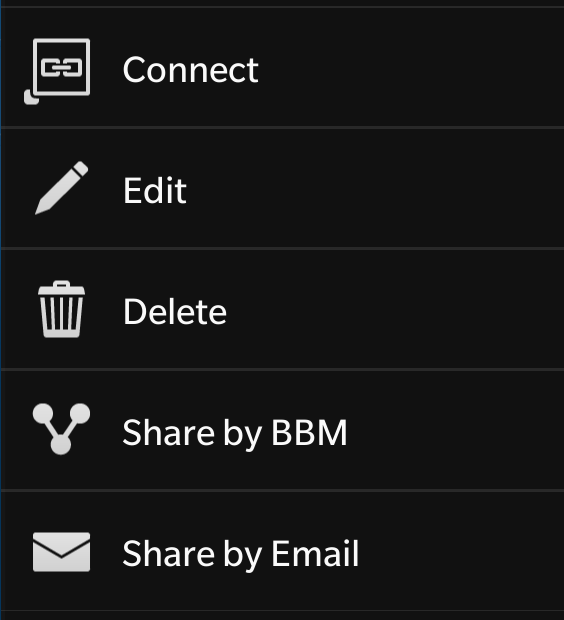
![]() Connect
to the highlighted Connection.
Connect
to the highlighted Connection.
![]() Edit
the highlighted connection.
Edit
the highlighted connection.
![]() Delete
the highlighted connection.
Delete
the highlighted connection.
![]() Send a copy of the highlighted connection to another person over BBM. Note: Saved credentials will NOT be included.
Send a copy of the highlighted connection to another person over BBM. Note: Saved credentials will NOT be included.
![]() Send a copy of the highlighted connection to another person by Email. Note: Saved credentials will NOT be included.
Send a copy of the highlighted connection to another person by Email. Note: Saved credentials will NOT be included.
Adding and Editing Connections
![]() To
add a new connection tap the New icon in the Action
Panel on the Home tab.
To
add a new connection tap the New icon in the Action
Panel on the Home tab.
![]() To
edit an existing connection tap and hold a connection in the home tab and
select the Edit icon from the available options.
To
edit an existing connection tap and hold a connection in the home tab and
select the Edit icon from the available options.
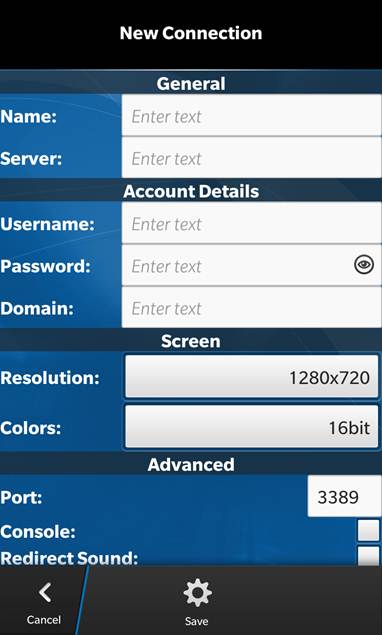
Once in the New and Edit screens fill out your connection details:
|
Name: This is the name you give your connection. This can be the name of the server or just a name that you use to associate with the machine you are connecting to. Server: In the server field you will enter in either the IP address (ie. 192.168.1.1) of your server or the fully qualified domain name(ie. Server.blackberry.com). Note: To get your machines IP enter ipconfig in a cmd box and look for the IPv4 address. Username: This is the username that you use to log into the machine you are connecting to. RDP Requires that the machine you connect to has a user account with a password. Password: this is the password you use with the associated username above to log into the machine you are connecting to. Note: If you leave the username and password blank you will be prompted for these when you connect and your credentials will be sent directly to the server over an encrypted stream. Domain: If the machine you are connecting to belongs to a Windows domain you would enter the Windows domain name. If not then you can leave this field blank. Resolution: The resolution you want to connect with. Examples include 1024x768, 1280x720, etc. Select one from the list. Colors: This will be the color depth for the connection. It is best to leave at the default 16bit for best performance. Port: If you are connecting to a system with a non standard port enter the port number. If not, then it is best to leave it at the default value which is the RDP desktop port. Console: this will allow you to connect to a console session. Redirect Sound: If checked sound will be played on the machine you are connecting to. Security: This will allow you to force a specified security type.
Experimental: These are features that are not yet produciton ready but have been included to allow you to try them out.
|
Once in a remote Desktop Session: Once you have connected to a server you will interact with your session in various ways.
Gestures (Gesture Mode): Tap: Tap to simulate a click on the screen Double Tap: Double tap to simulate a double click. Press and Tap: If you press and tap a right click will take place in the initial press location. Pinch: Pinch to zoom in and out of the screen. Pan: Pan by moving a single finger around the screen. Press and Hold: If you press and hold it will initiate a mouse down and move. This can be used to move windows or scroll using a scroll bar.
Pointer Mode:
All of the Gestures from Gesture Mode still apply in Pointer mode though there is some additional functionality to allow more precise control in an RDP session.
The additional functionalty includes:
-
An onscreen pointer.
-
An onscreen scroll bar.
-
An onscreen mouse that displays which button is clicked when a tap occurs and provides right click functionality when tapped.
To use the onscreen pointer place your finger a short distance away from the pointer. If you are controlling the oncreen pointer a circle will appear around the pointer:
 If you see the pointer control circle moving your finger will move the pointer. Note: If you do not see the onscreen control circle then moving your finger will pan the view the same as in Gesture Mode.
 Press and hold will turn the pointer control inner circle to orange indicating that you are in Press and Hold mode which is the same as the Press and Hold Gesture in Gestuure mode.
![]() Tapping on the mouse icon will initiate a right click and change the right button to orange
Tapping on the mouse icon will initiate a right click and change the right button to orange ![]() for a short period of time indicating a right click has been initiated.
for a short period of time indicating a right click has been initiated.
![]() Tapping anywhere outside of the scroll bar or mouse icon will initiate a left click and the left mouse button will be highlighted blue for a period of time indicating that a left click has been intiated.
Tapping anywhere outside of the scroll bar or mouse icon will initiate a left click and the left mouse button will be highlighted blue for a period of time indicating that a left click has been intiated.
![]() Placing your finger in the scroll bar will activate scroll mode turing the scroll bar blue.
Placing your finger in the scroll bar will activate scroll mode turing the scroll bar blue. ![]() Once in scroll mode, moving your finger up and down the scroll bar will scroll up and down.
Once in scroll mode, moving your finger up and down the scroll bar will scroll up and down.
Keyboard:
To type either swipe up from the bottom with two fingers to show the keyboard or swipe down from the top to shop the application menu and tap the keyboard icon.
Once the keyboard is shown typing will send your key strokes to the remote system.
The Application Menu:
Swipe down from the top to show the application menu:

Back: Exit the Remote Desktop View without disconnecting from the session.
Ctrl-Alt-Del: Send ctrl-alt-delete to the remote system.
Keyboard: Tap to show the onscreen keyboard or if your device has a keyboard to show the typing and additional function keys bar.
Disconnect: Disconnect from the session but leaving your applications open. You can later connect to the same computer and it will be in the same state as you left it.
Use Gestures: Work in Gesture mode. See above for an explaination of each of the gestures.
Use Pointer: Work in Pointer mode. See above for using Pointer Mode.
The Button Bar:
When the keyboard is show a button and text bar will appear with the keyboard. The test bar will show text typed into a sesison while the button bar allows you to use addtional buttons not included with the BalckBerry keyboard.
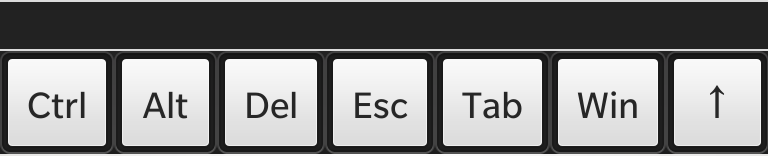
Note: Not all of the buttons are visible, so to scrool through the available buttons swipe the button bar to the left and right to show additional buttons.
Note: The "ctrl" and "alt" keys are sticky keys and as a result when pressed will stay actyivated until you tap them again to deactive them. This simulates holding down the they while you type multiple other keys.
Managing Open Connections
To manage open connections go to the Connected Tab. Here you can disconnect sessions or resume interacting with an open session.
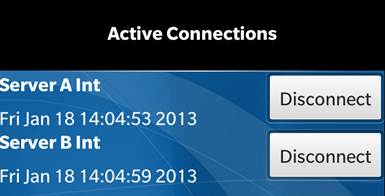
Show for each connection is the connection Name, the connect time, and a disconnect button.
To disconnect a session tap the disconnect button for the session you wish to disconnect.
To resume interacting with a session tap the name of the connection you wish to resume.
Getting Started Guide
This is a quick guide to helping you get up and running with Remote Desktop for BlackBerry
First ensure that your computer is configured to allow Remote Desktop Connections. To do so for Windows 7 please follow the steps below:
1. Open Control Panel from the Start menu.
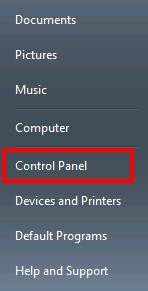
2. System and Security
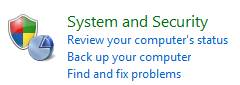
3. Under System on the right hand side of the window select Allow Remote Access

4. Ensure that Allow connections from computers running and version of Remote Desktop (less secure)
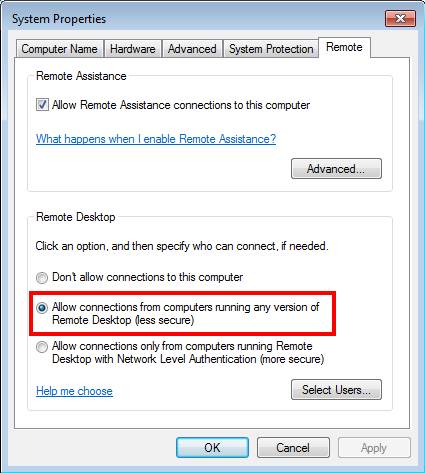
5. You may need to click Select Users and add your user account (ie. your login name) to that list to allow your account access to the machine via the RDP protocol.
Once your computer is configured fill in the fields in a New Connection with the following information:
|
Name: This is the name you give your connection. This can be the name of the server or just a name that you use to associate with the machine you are connecting to. Server: In the server field you will enter in either the IP address (ie. 192.168.1.1) of your server or the fully qualified domain name(ie. Server.blackberry.com). Note: To get your machines IP enter ipconfig in a cmd box and look for the IPv4 address. Username: This is the username that you use to log into the machine you are connecting to. RDP Requires that the machine you connect to has a user account with a password. Password: this is the password you use with the associated username above to log into the machine you are connecting to. Note: If you leave the username and password blank you will be prompted for these when you connect and your credentials will be sent directly to the server over an encrypted stream. Domain: If the machine you are connecting to belongs to a Windows domain you would enter the Windows domain name. If not then you can leave this field blank. Resolution: The resolution you want to connect with. Examples include 1024x768, 1280x720, etc. Select one from the list. Colors: This will be the color depth for the connection. It is best to leave at the default 16bit for best performance. Port: If you are connecting to a system with a non standard port enter the port number. If not, then it is best to leave it at the default value which is the RDP desktop port. Console: this will allow you to connect to a console session. Redirect Sound: If checked sound will be played on the machine you are connecting to. Security: This will allow you to force a specified security type.
Experimental: These are features that are not yet produciton ready but have been included to allow you to try them out.
|
To connect to a computer through your router you would need to do one of the following:
1. Set up a VPN back to your home network in the PlayBook settings and connect to that VPN prior to trying to connect to your home machine. OR 2. Set up a firewall rule on your router to forward port 3389 to your home machine and then in the Server field enter in your public IP address of your router (the WAN IP address). Note: If your ISP gives you a dynamic IP address you can use something like dydns.org to have you dynamic IP address always associated with a fully qualified domain name which you would enter in the Server field instead of the WAN IP.
Note: The configuration of VPNs and firewall rules vary from router to router and so you should refer to your router manual on how to set a port to be forwarded. This also works best if you configure the computer you want to use for Remote Desktop connections to have a static IP on your internal network.
Here are some instructions for setting up a port forward for a Netgear router:
Instructions for port forwarding for Netgear WGR614
First you will need to go to the Port Forwarding/ Port Triggering section of your Router configuration (This will be under the Advanced heading in the Main Menu)
Once there click the Add Custom Service button.
In the Custom Service Enter the following information: Service Name: RDP Service Type: set to TCP/UDP Starting Port: 3389 Ending Port: 3389 Server IP Address: This will be the IP address of the computer you want to connect to (to get that open a cmd prompt on your computer and type ipconfig, use the IPv4 address) Click Apply. You now have the port forward configured.
Now, on your PlayBook enter in the WAN IP (Internet address in the server field) See below:
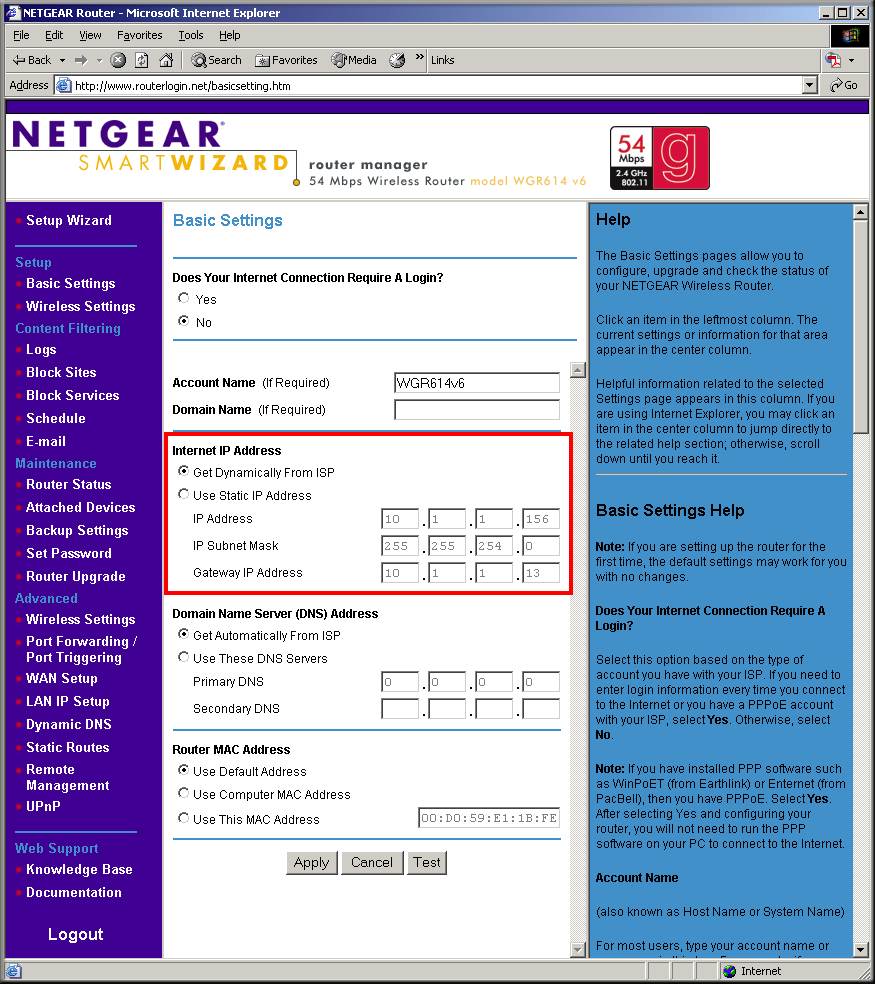
Optional Settings
You should probably configure your computer so that it always has the same IP address. To do this you would enter in the IP address you entered in above when you create a custom service, the MAC address for your device (this can be obtained in a cmd prompt by typing "ipconfig /all" without the quotes and using the physical address see below) and then naming the device like mydesktop and clicking add.
The MAC address is highlighted in red.
![]()
As well it is common for ISPs to provide dynamic IP addresses that change often. To work around this there are a number of services that will prove a domain name for your changing IP address that is always up to date. The most common is dyndns.org. To use this service first sign up (it is free though they do have other services that are paid but all you need is the dynamic dns service). Once you have signed up you will enter the hostname they provided you or you picked in the Hostname field, your dyndns.org username and password will go in the username and password fields and then just check the Use a Dynamic DNS service and click apply.
Now on your BB10 Smart Phone you will enter the hostname you got from dyndns.org in the Server field and you will be able to connect to your desktop from anywhere so long as your desktop is turned on and you have an active internet connection.